

Keep Your Drinks Cool at the Beach: 7 Proven Steps
Table of Contents
- Step 1: Pre-Chill Your Cooler and Drinks Before You Leave
- Step 2: How to Keep Drinks Cold Without Ice
- Step 3: Best Beach Cooler Packing Tips for All-Day Cold
- Step 4: Choose the Right Cooler for Beach Conditions
- Step 5: Keep Your Drinks Cool at the Beach With Smart Opening Habits
- Step 6: Manage Shade, Sand, and Weight on the Beach
- Step 7: Handle Food Safely and Keep Your Drinks Cool All Day
- Frequently Asked Questions
Last Updated: September 29, 2026
Step 1: Pre-Chill Your Cooler and Drinks Before You Leave
The best way to keep your drinks cool at the beach starts hours before you pack the car. A cooler that starts warm fights its own walls before it chills a single can.
Pre-chilling means cooling the cooler itself, not just the drinks. Add ice or frozen gel packs to an empty cooler, let it sit a couple of hours, pour out the meltwater, then pack for real.
Do the same with your drinks: overnight in the fridge beats a quick rinse under the tap. Cold cans lower the starting temperature inside, so your ice lasts longer.
- Chill drinks in the fridge the night before
- Pre-cool the cooler with ice or frozen gel packs
- Freeze water bottles to double as ice packs
- Keep the cooler in the shade while you pack
That last point matters more than people think. A cooler sitting in direct sun on the driveway is already losing ground. The USDA Food Safety and Inspection Service guidance on keeping food safe makes the same point about heat: the clock starts the moment cold items meet warm air.
Step 2: How to Keep Drinks Cold Without Ice
You can keep drinks cold without ice by using frozen gel packs, frozen water bottles, or a well-insulated cooler with a tight seal. Ice is convenient, but on a beach it is often the worst coolant, because meltwater turns your cooler floor into a soup that soaks labels, snacks, and towels.
The real question is which coolant matches your trip length, your walk from the car, and whether you want to drink the melt.
Frozen water bottles. Fill bottles three-quarters full and freeze upright with the cap loose, then tighten once frozen, water expands, and a full bottle can split. They pull double duty: coolant while frozen, cold drinking water as they melt. A common pattern is one frozen bottle per two or three cans for a half-day trip.
Frozen gel packs. They hold their shape, stay cold longer than cubed ice in many setups, and will not leave snacks swimming in meltwater. The trade-off is weight: gel packs are dead weight on the walk back and take hours to refreeze. Best for day trips where you can re-freeze overnight.
Block ice. Slowest to melt, best for full-day trips and large groups. A single block has far less exposed surface than the same weight of cubes, so it melts at a fraction of the rate. It chills slowly, though, so pair it with a little cubed ice or a gel pack to drop the initial temperature fast.
Cubed ice. Fast cooling, but it melts quickly and leaves meltwater behind. Use it as a top-layer booster, not as your primary coolant for an all-day beach trip.
Dry ice. Worth knowing about, not worth recommending for most beachgoers. It is far colder than water ice and sublimates instead of melting, but it requires gloves, ventilation, and a cooler that can vent gas.
A simple ratio for most beach days: roughly two parts coolant to one part drinks by volume, packed so the coolant surrounds the drinks rather than sitting on top.
- Frozen water bottles: drinkable backup, no mess, lightest option
- Frozen gel packs: long-lasting, reusable, no puddles, heavy on the return trip
- Block ice: slowest to melt, best for full-day trips
- Cubed ice: fast cooling, melts fast, use as a booster
- Dry ice: coldest option, needs handling precautions
One beach-specific note: keep your coolant in a separate cooler from your food if you can. Meltwater from a drink cooler is fine; meltwater from a cooler that held raw food is not something you want pooling around your cans. Maintaining this separation prevents cross-contamination while you organize your gear and select the appropriate coastal beach apparel for a long afternoon by the water.
Step 3: Best Beach Cooler Packing Tips for All-Day Cold
Layer it like this:
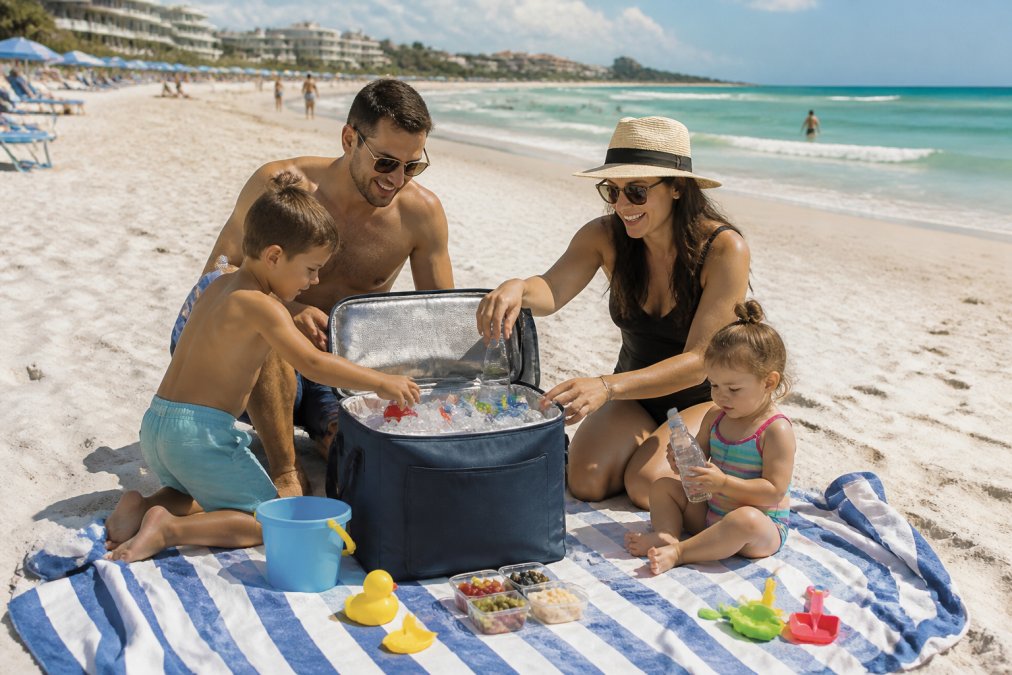
- Block ice or frozen gel packs on the bottom
- Heaviest drinks and items next
- Lighter items and snacks on top
- A layer of ice or a gel pack across the surface
- A towel or extra insulation over the top before closing
For beach trips, a backpack cooler keeps your hands free for chairs, towels, and kids. The Garden Party Packi 24 Backpack Cooler is built for exactly that kind of trip, with room for drinks and snacks and a design made to carry on your back.

Step 4: Choose the Right Cooler for Beach Conditions
Beach conditions punish coolers in ways a backyard barbecue never does. Sand, sun, and long walks from the parking lot all take a toll.
Look for these features:
- Thick insulation or a vacuum-insulated design
- A tight-sealing lid or zipper
- Waterproof or easy-rinse exterior material
- Comfortable straps or handles for carrying
- A size that matches your group
| Cooler Type | Best For | Cold Retention | Portability |
|---|---|---|---|
| Backpack cooler | Hands-free beach walks | Good | High |
| Soft-sided tote | Small groups, short trips | Good | High |
| Hard-sided cooler | Large groups, all-day trips | Best | Low |
| Mini tote | Solo trips, light packing | Good | High |
Step 5: Keep Your Drinks Cool at the Beach With Smart Opening Habits
Every time you open the lid, cold air spills out and warm air moves in. To keep your drinks cool at the beach all day, cut down on how often the cooler opens.
Other habits that help:
- Decide what you want before you open the lid
- Grab several drinks at once, not one at a time
- Close the lid fully every time
- Keep the cooler out of direct sun
Step 6: Manage Shade, Sand, and Weight on the Beach
-
Set the cooler on a towel, a mat, or a low beach table, never directly on the sand
-
Keep the lid closed when you are not actively pulling a drink out
-
Rinse the exterior and wipe the seals at the end of every trip, before the sand dries and sets
-
Avoid dragging a soft-sided cooler across sand; the abrasion wears the base fabric
-
Pack drinks in a backpack cooler for even weight distribution across your shoulders instead of one hand
-
Make two lighter trips instead of one heavy one, your back will thank you
-
Use a cooler with a shoulder strap or a wheeled option if the walk is long
-
Leave the hard-sided cooler for short walks from the parking lot
-
Load the cooler at the car, not at home, so you are not carrying the full weight through the house and down the stairs
The combination is what matters: shade slows heat gain, sand control protects the seal, and weight management keeps you from dreading the walk back. Get all three right and your cooler is still cold when the sun drops.
Step 7: Handle Food Safely and Keep Your Drinks Cool All Day
Food safety and cold drinks go hand in hand on a hot beach. The same heat that melts your ice can spoil your lunch.
- Freeze water bottles to use as both coolant and drinking water
- Keep the food cooler closed until you eat
- Return leftovers to the cooler right away
- Skip anything that sat out in the sun
Frequently Asked Questions
What is the best drink cooler for the beach?
A soft-sided cooler with thick insulation and a secure zipper works best for the beach. The Garden Party Packi 24 Backpack Cooler ($119.95) keeps drinks cold for hours and leaves your hands free for chairs and towels. For a smaller load, the Case-Mate Mini Jelly Cooler Tote 7L ($150.00) holds drinks and snacks cold for over 24 hours. Look for a cooler that seals tightly, resists sand, and is easy to rinse off after a salty day.
How can I keep drinks cool without using ice?
Freeze water bottles or gel packs the night before and use them as your coolant. A 2:1 ratio of drinks to frozen items works well. You can also pre-chill cans in the refrigerator for at least 12 hours before packing. A vacuum-insulated cooler with a tight seal will hold that cold for hours. The Case-Mate Ballet Pink Large Jelly Cooler Tote 12L keeps up to two dozen cans cold for over 24 hours without needing a single cube of ice.
How do you prevent ice from melting too quickly in a beach cooler?
Start with a pre-chilled cooler. Fill it with ice or frozen packs the night before, then dump and refill right before you leave. Use block ice instead of cubed ice because it melts slower. Keep the cooler in the shade and avoid opening it more than necessary. A cooler with a tight seal and thick insulation, like the Check Mate Boxxi 24 Cooler ($129.95), slows heat transfer and keeps ice solid through a full beach day.
What are the best tips for packing a cooler for the beach?
Layer from the bottom up: block ice or frozen bottles first, then heavier drinks, then lighter items, and a final layer of ice or gel packs on top. Fill empty space with additional cold items or a towel to reduce air pockets. Pre-chill everything before it goes in. Keep the cooler closed between uses and park it in the shade. A backpack cooler like the Garden Party Packi 24 ($119.95) makes carrying a full load across sand easier.